


Barre chords, also known as bar chords, are an essential part of a guitarist’s toolkit. These chords allow you to play a wide range of sounds by using one finger to press down multiple strings at once.
For guitarists, mastering barre chords unlocks a world of chord options, enhancing their ability to play various genres and songs.
However, beginners often struggle with these chords due to the finger strength and technique required, but with patience and practice, they become a valuable asset in any guitarist’s repertoire.
Step-by-Step Barre Chord Learning Process
Mastering barre chords can be challenging, but by breaking it down into a step-by-step process, you’ll build the strength and technique needed to play them effectively.
Step #1: Start with the Half-Bar Method
The best way to begin learning barre chords is by using the half-bar method.
- Start by placing your index finger across just two or three strings, rather than all six. For example, on the second fret, press down on the top two or three strings (E and B, or G, B, and E).
- Strum these strings slowly and listen for clarity. If you hear buzzing or muted notes, adjust your finger positioning until the sound is clean and clear.
- Move your half-bar technique up and down the fretboard. It will help build the necessary strength in your index finger and improve finger placement accuracy.
Step #2: Gradually Progress to Full-Bar Chords
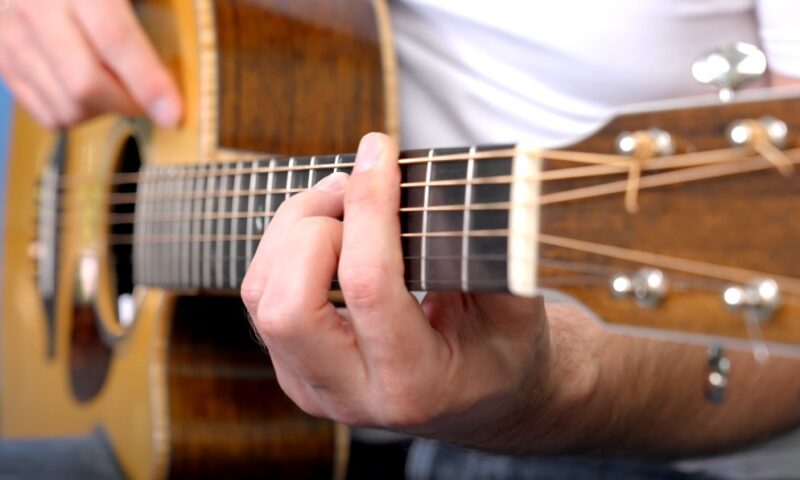
Once you’re comfortable with the half-bar method, it’s time to transition to full-bar chords, where you’ll bar all six strings with your index finger.
- Start by laying your index finger flat across all six strings on a chosen fret. The pressure should be even across all strings to avoid buzzing.
- Use your middle, ring, and pinky fingers to form the rest of the chord shape. For example, to form an F major chord, place your index finger across the first fret, your middle finger on the second fret of the G string, and your ring and pinky fingers on the third fret of the A and D strings.
- Strum all six strings to test the sound. If any notes sound muted or unclear, adjust your finger pressure and positioning. It’s common for beginners to struggle with getting all six strings to ring clearly, but practice will improve clarity over time.
Step #3: Alternate Between Major and Minor Barre Chords
To improve your versatility with barre chords, practice switching between major and minor shapes. Alternating between these chords adds variety to your practice sessions and helps solidify muscle memory.
- The most common major shape is derived from the E major open chord. Place your index finger across the fret, then use your other fingers to recreate the E major shape one fret up.
- To form a minor barre chord, keep your index finger barring the fret but adjust your finger positioning to mimic the E minor open shape.
- Start slow by switching between a major and minor barre chord shape on the same fret. Once you’re comfortable, practice moving up and down the fretboard, alternating between major and minor chords at different frets.
Step #4: Repeat Consistently for Muscle Memory
Consistency is the key to mastering barre chords. Repetition will build muscle memory, making it easier to switch between chords without having to think about finger placement.
- Set aside time each day to practice your barre chords. Focus on both half-bar and full-bar exercises to build strength and flexibility in your fingers.
- Find songs that use barre chords and incorporate them into your practice sessions.
- As you practice, pay attention to your transitions between open and barre chords. Over time, your hand will become stronger, and you’ll be able to switch between different chord shapes more smoothly and quickly.
Exercises to Strengthen Your Fingers
Strengthening your fingers is key to mastering barre chords, and it requires consistent practice with targeted exercises. Developing both finger strength and independence will help you execute barre chords with ease and confidence.
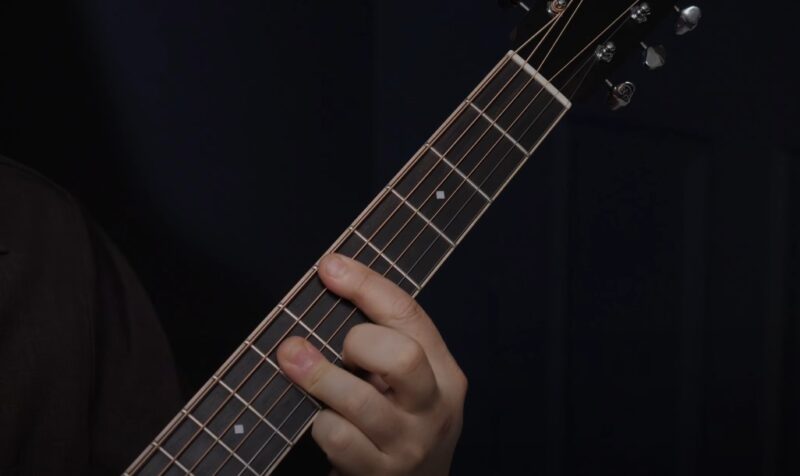
Barring All Six Strings Exercise
One of the most effective exercises for building finger strength is the six-string bar practice. Start by using your index finger to bar all six strings on the first fret.
Once in position, pluck each string individually to ensure that each one rings out clearly. If you hear any buzzing or muted notes, adjust your finger placement or apply more pressure.
The goal is to get every string to sound cleanly while using as little force as possible.
Repeat this exercise by moving up and down the fretboard, barring all six strings at different frets. This not only helps strengthen your index finger but also builds the muscle memory required to execute barre chords smoothly across the entire neck of the guitar.
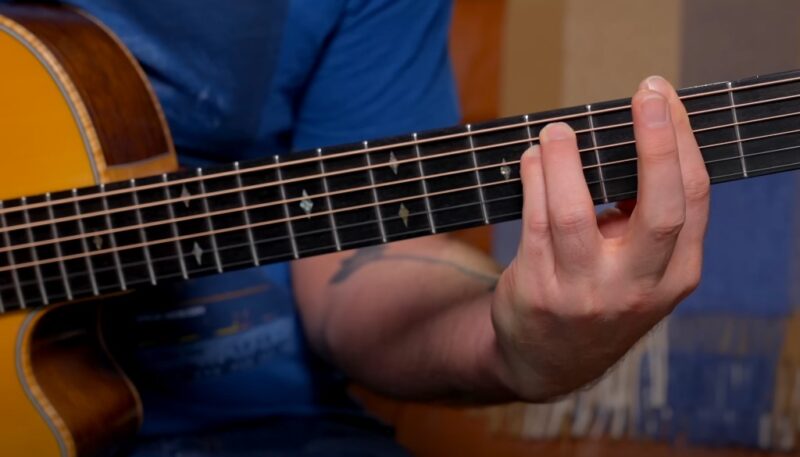
Finger Independence Through Chord Progressions

In addition to finger strength, finger independence is essential when playing barre chords. A useful exercise for improving finger independence is practicing chord progressions that involve switching between barre chords and open chords.
Select a few songs or create simple chord progressions that incorporate both types of chords. Focus on transitioning quickly and accurately between them while maintaining a clean sound for each chord.
This exercise not only enhances finger dexterity but also improves your ability to switch between different chord shapes in real-world playing scenarios. As you progress, you can challenge yourself by increasing the speed of your transitions or incorporating more complex chord progressions.
Strength-Building with Finger Stretches
An additional method to strengthen your fingers for barre chords is through finger stretching exercises.
Start by gently stretching your fingers apart, one at a time, while keeping your wrist relaxed. This helps improve flexibility and prevents stiffness, which is crucial for holding down multiple strings at once.
Another version of this stretch involves placing your fingers on the fretboard and reaching for strings spaced far apart.
Gradually, this improves your ability to stretch your fingers across wider intervals, which is beneficial when playing larger barre chords. Regular stretching before and after practice can also help reduce tension and prevent injuries.
Building Strength with Finger Tapping Exercises
A more advanced exercise to build finger strength is the finger-tapping technique. Practice tapping on the fretboard with different fingers, starting with your index finger and moving through to your pinky.
This helps increase strength and coordination in each individual finger, ensuring that you can press down firmly when playing barre chords.
Try combining this with plucking exercises, tapping a string with one finger and then plucking it to check for sound clarity.
It is particularly useful for strengthening your non-dominant fingers, which are often underutilized in barre chords but play an important role in maintaining stability and control.
The Bottom Line
Mastering barre chords takes patience, persistence, and consistent practice. While the journey can be challenging, the rewards are immense.
By following the steps outlined above, from adopting the right mindset to practicing essential exercises, you’ll steadily improve your barre chord proficiency.
Remember to take your time, stay positive, and celebrate your progress along the way. With dedication, barre chords will become a natural and indispensable part of your guitar playing.